Painting How To
Step-by-step oil painting of a Peony
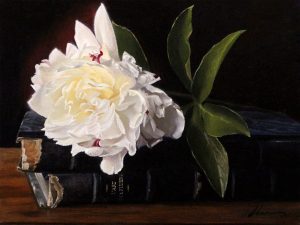 Peony
Peony
12×16 inches | Oil on Canvas
Growing up in Southern California, I don’t remember ever seeing a peony growing in a garden. So, when I moved to Southern Oregon, I discovered a volunteer peony blooming in our front yard. What an awesome surprise! I had a lot of fun painting the subtle whites of its opulent bloom. To complement the delicate nature of the flower, I chose to use the dark, weathered texture of old art books as the background.
A quick look at my process
This time-lapse video shows my process of painting Peony in 6:45 minutes. The total painting time was about 30 hours. Below the video is the step-by-step oil painting process I used to create Peony.
STEP 1: Drawing on canvas
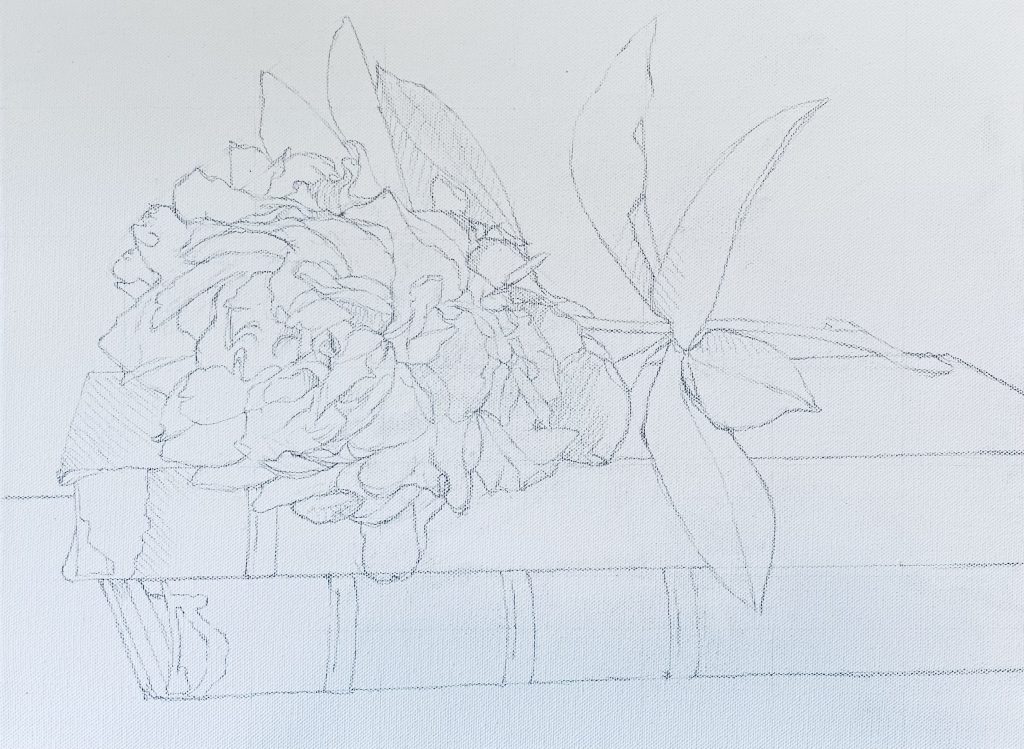
Freehand drawing is the time to explore
Drawing freehand with pencil directly on the canvas panel helps me explore and refine the composition. It also familiarizes me with all the elements—the petals, leaves, books, and the dark and light patterns—and their relationships to each other. I pay close attention to the rhythm, placement, and orientation of the peony petals. Spray fix holds the drawing in place.
STEP 2: Blocking in
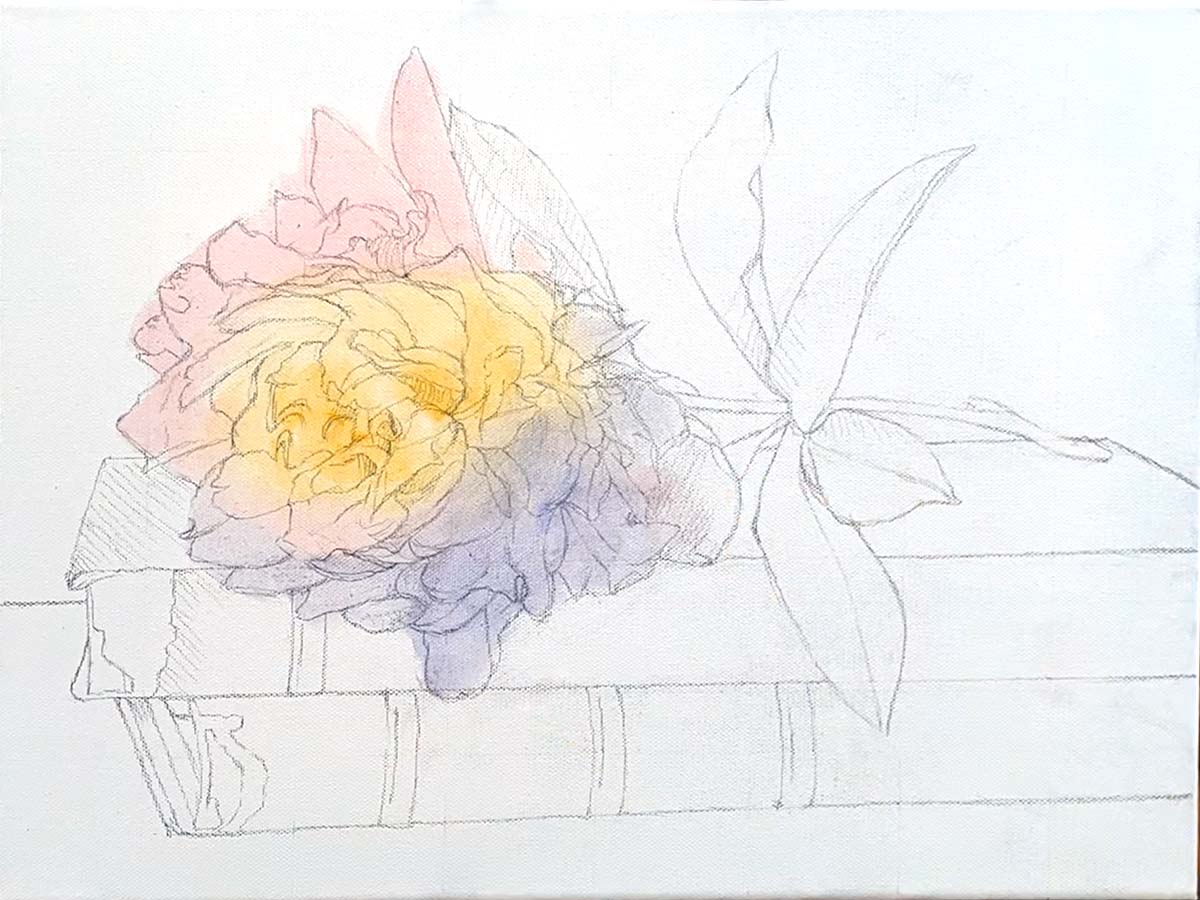 FLOWER:
I begin blocking in with a “wash” of a mix of Indian and Cadmium Yellow Light, adding a wash of Alizarin Crimson and Ultramarine Blue. The wash is a fast-drying alkyd medium mixed with a tiny amount of color. It’s applied extremely thin by scrubbing in onto the surface with a small bristle brush. These colors form a base that will show through in the final painting, allowing light to shine through this thin layer of color to enhance the glowing effect I love.
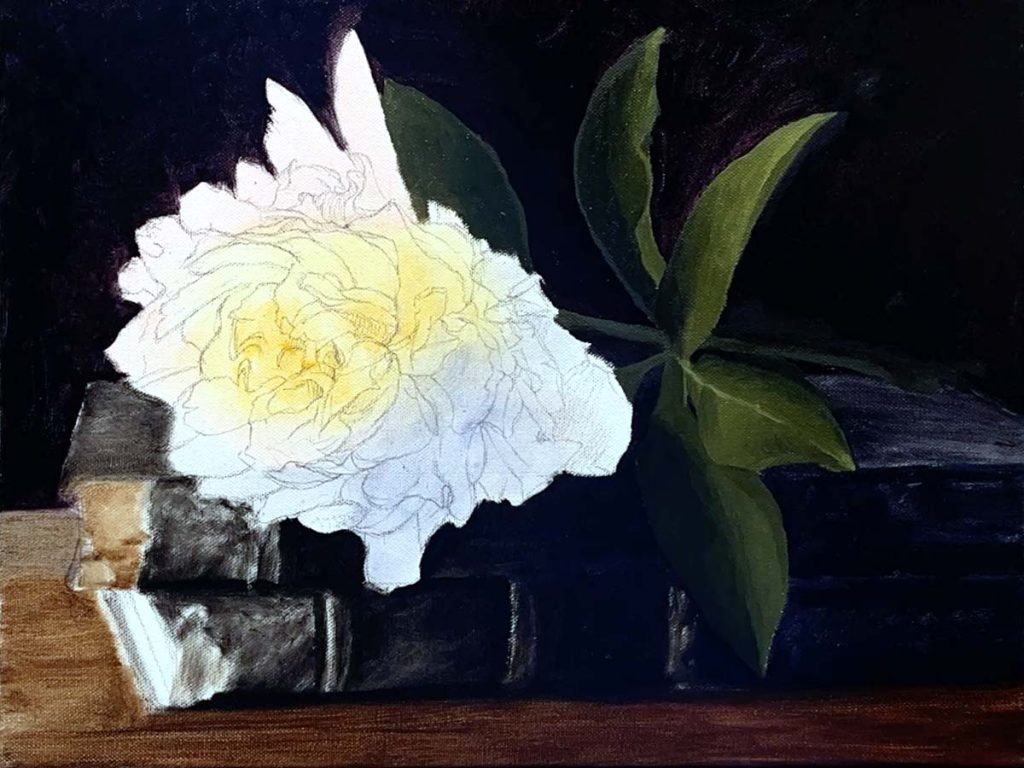
BACKGROUND: I create subtle temperature shifts in the background using various mixtures of alizarin crimson with ultramarine blue, along with a touch of burnt umber. The left side of the background predominantly features crimson and ultramarine, while the right side becomes warmer with the addition of burnt umber.
TABLE AND BOOKS: I scrub in the books and table with burnt umber, indicating shades with thicker strokes of burnt umber.
LEAVES: I add the leaves with a mix of Indian Yellow and Ivory Black.
STEP 5: Refining the flower petals

I block in the petals starting with the areas in shadow using a neutral gray and subtle shades of off-white. I keep in mind that I want the yellow wash to show through in the finished work to help the center of the bloom glow when blocking in the lighter petals.
STEP 6: Refining the flower petals

Smoothing out the surfaces, refining the lighting, and balancing the colors bring us to the final touches for the flowers.
I add a thin line to the edges of the leaves to define their thinness. A light blue glaze suggests the reflection of the blue sky on the leaf on the right.
STEP 7: Finishing touches – books, table, and petals

I add final touches to the shadows and reflective tabletop. The last strokes include cool gray and white highlights to the books to bring out the texture, contrasting with the soft glow of the peony. As a fun finishing touch, I added a title to the bottom book, “L’Art des Fleurs” – The Art of Flowers.
Finished – Peony
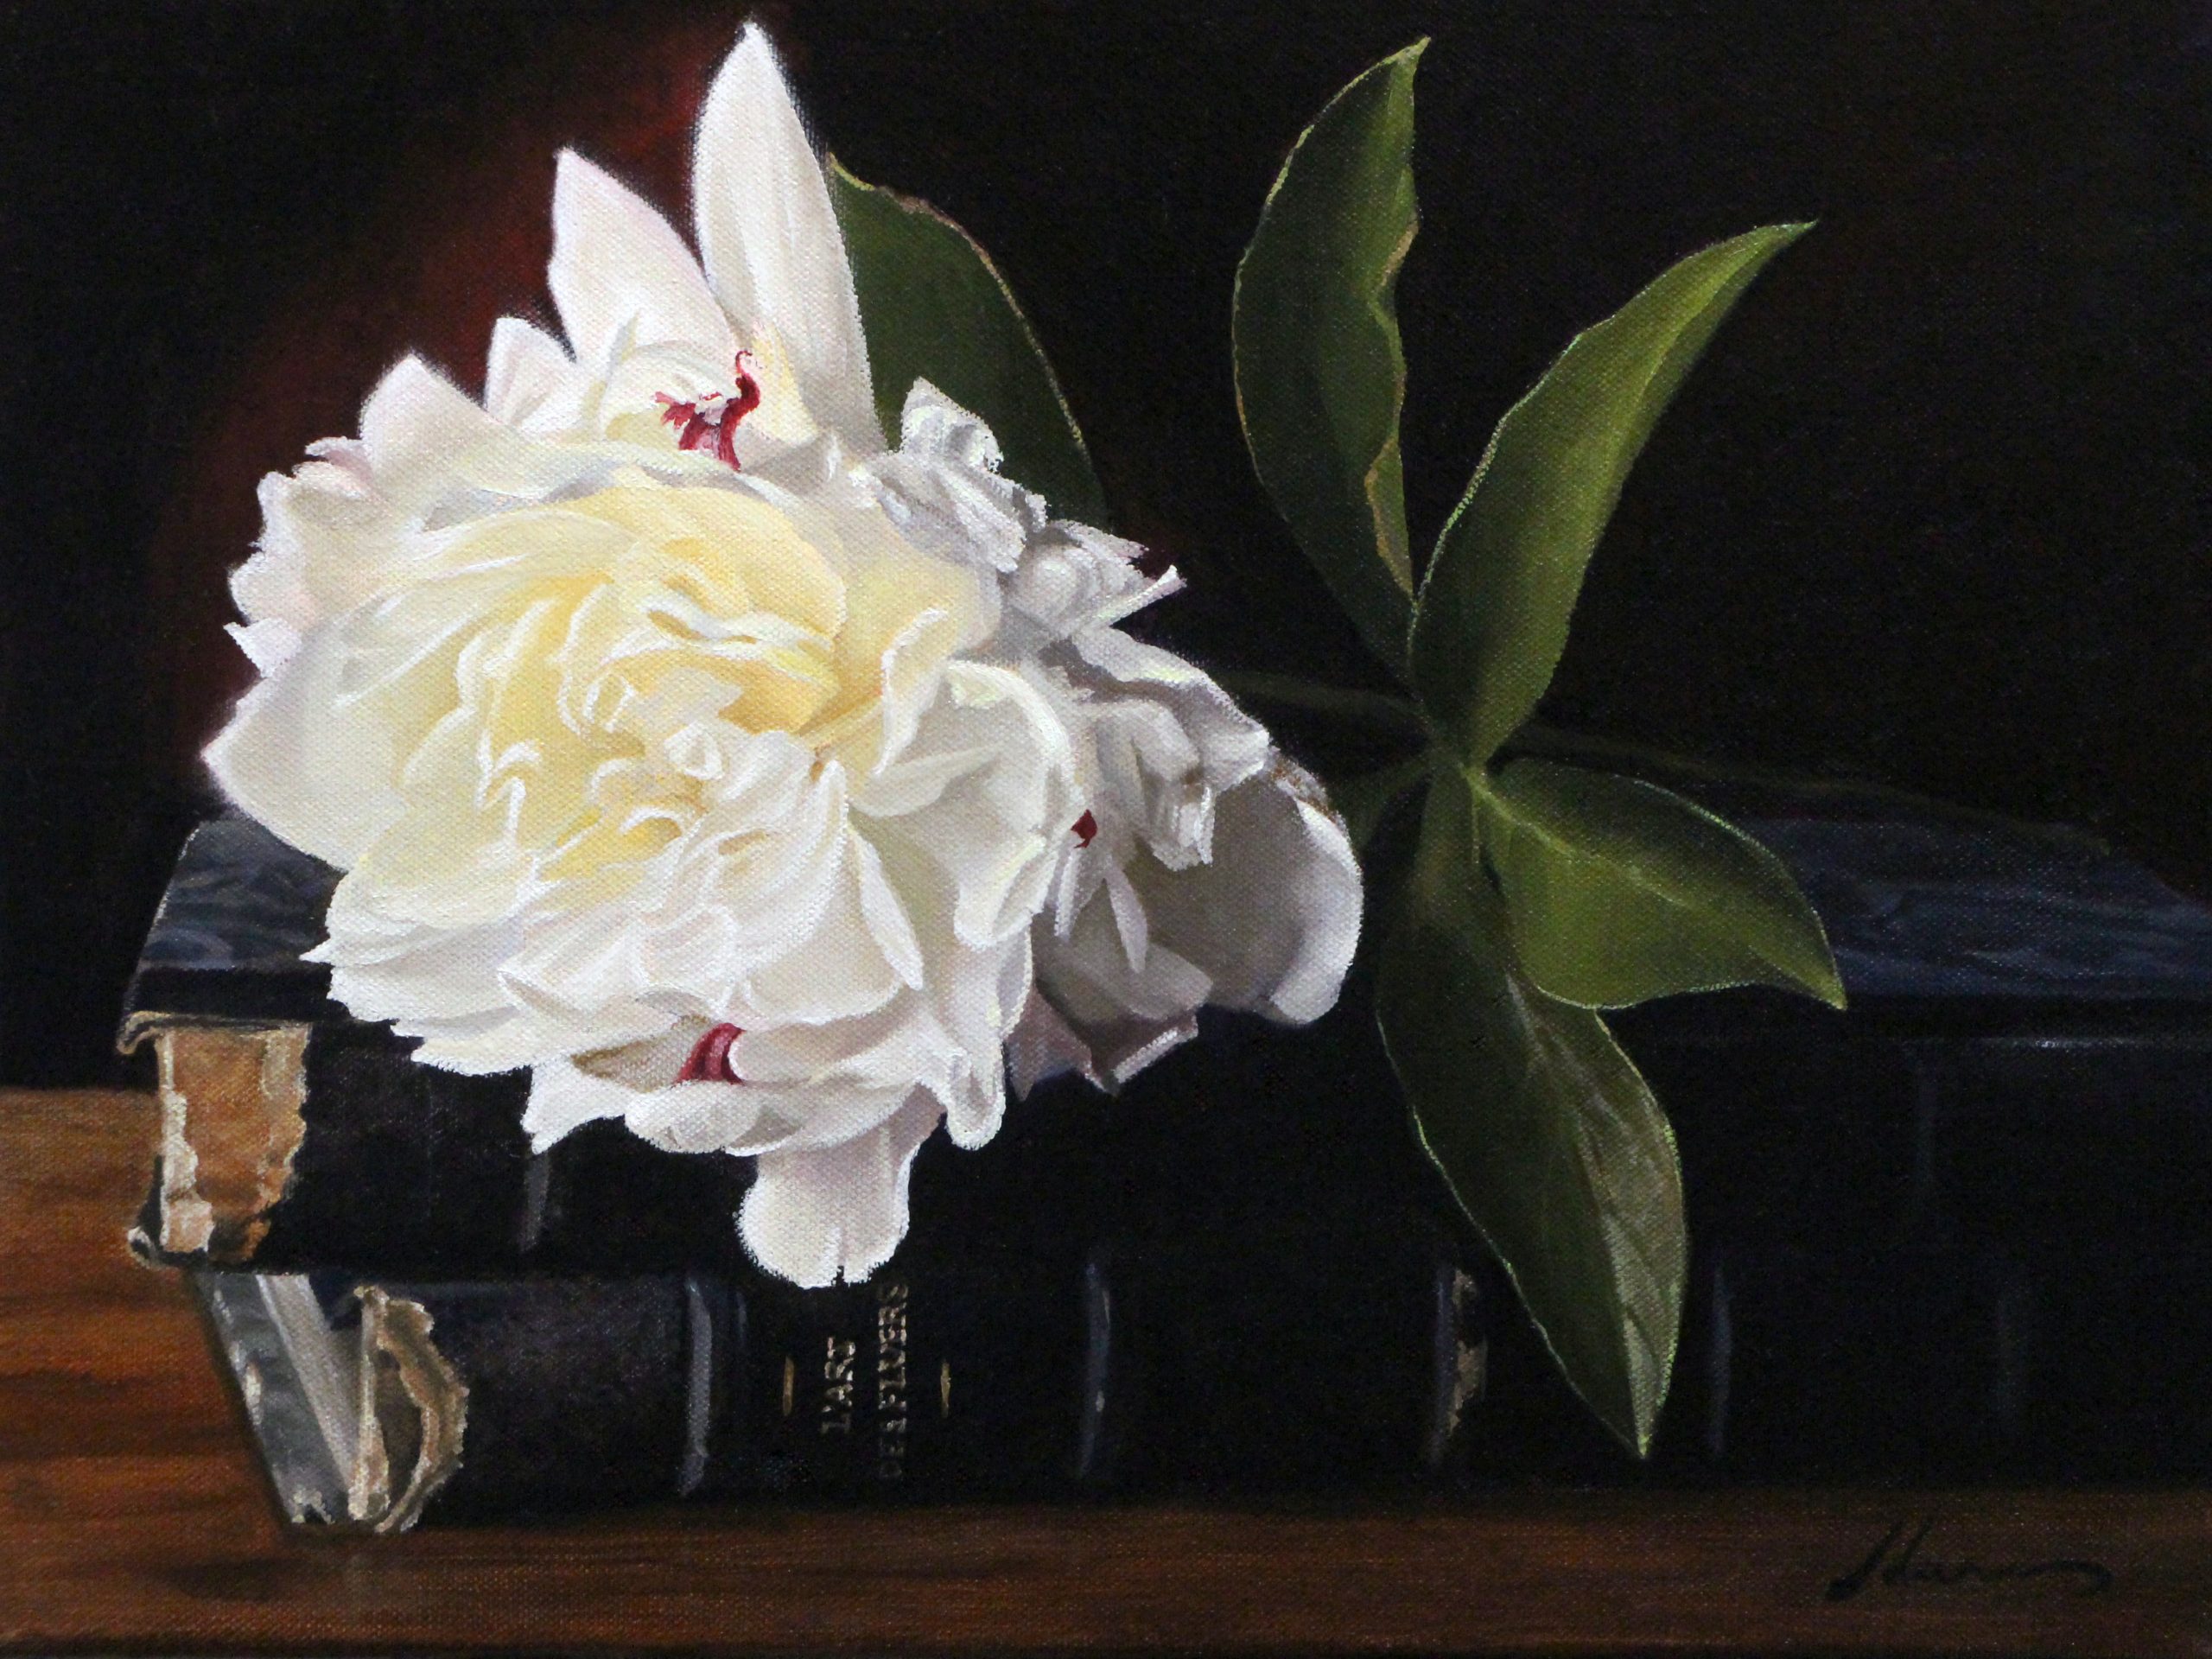
Peony
12×16 inches | oil on canvas panel
SOLD
More of my available painting can be seen
online or in-person through Lily Pad West Gallery
Lily Pad West Gallery
215 N Broadway
Milwaukee, WI 53202
414 509-5756
Materials
Canvas Panel – acrylic double primed
Paints (M Graham)
In the order arranged on my palette
M Graham Walnut Oil Paints
Alizarin Crimson
Cadmium Yellow Light
Cadmium Yellow Medium
Cadmium Orange
Cadmium Red
Indian Yellow
Ultramarine Blue
Burnt Umber
Ivory Black
Titanium White Rapid Dry
Medium
Walnut Alkyd Medium
Brushes
Rosemary & Co Brushes
Brush Cleaner
Turpenoid Natural
The Master’s Brush Cleaner
FAVORITE BOOKS
Great instruction and wonderful inspiration for all level.
 Alla Prima II Everything I Know about Painting by Richard Schmid
This is my painting artist’s Bible. Icon Richard Schmid shares his wisdom and technical savvy, which came from a classical education and a lifetime of painting and teaching. The supreme alla prima master, Richard gracefully leads his reader through the subtleties of painting theory and technique with refreshing directness and unmatched technical authority. Richard's insights and lessons are not just valuable for alla prima painting, but for all styles.
Learn More
 Alla Prima II Companion: Richard Schmid's Materials, Tools and Techniques
Richard Schmid's Materials, Tools and Techniques - By Katie Swatland. The path to creating great works of art begins with knowing the capabilities of your materials and tools.Contained within the pages of this book are detailed descriptions of the processes that go into the creation of a painting.
Learn More
 Luminous: The Art of Michael Lynn Adams
Painter Michael Lynn Adams explores how his childhood nurtured his artistic curiosity and shares methods for creating luminous works, illustrated with over 95 paintings and drawings.
Learn More
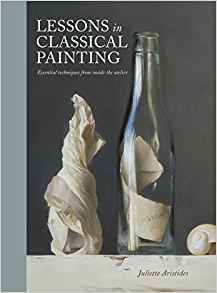 Lessons in Classical Painting: Essential Techniques from Inside the Atelier
 by Juliette Aristides
Lessons in Classical Painting presents aspiring artists with the fundamental skills and tools needed to master painting in the atelier style. With more than 25 years of experience in ateliers and as an art instructor, Aristides pairs personal examples and insights with theory, assignments, and demonstrations for readers, discussions of technical issues, and inspirational quotes.
Learn More
![]() The Art of Still Life
The Art of Still Life by Todd M. Casey
The Art of Still Life offers a comprehensive, contemporary approach to the subject that instructs artists on the foundation basics and advanced techniques they need for successful drawing and painting. In addition to Casey's stunning paintings, the work of over fifty past and present masters is included, so that the book is both a hardworking how-to manual and a visual treasure trove of some of the finest still life art throughout history and today.
Learn More
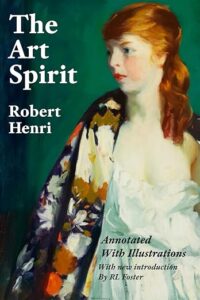 The Art Spirit by Robert Henri
"Art when really understood is the province of every human being." So begins The Art Spirit, the collected words, teachings, and wisdom of innovative artist and beloved teacher Robert Henri. Henri, who painted in the Realist style and was a founding member of the Ashcan School, was known for his belief in interactive nature of creativity and inspiration, and the enduring power of art.
Learn More
Your blog is full of fresh ideas! I’ve been hooked for nearly an hour. Thanks a lot!
This is one of the best art blogs. Thank you for all the great information.
Really, really great. Thanks for taking the time to post this. Sending to Gemma and the girls now. Guessing this is what they’ll study next.
Thank you so much, Justin. Love hearing from you. You and Gemma have created an amazing, creative environment for your girls. I would be honored to have this little demo inspire a creative project for them. Hugs to you all!
Incredible work! I’ve spent a lifetime trying to paint like you. I live in Medford do you teach?
Thank you for the compliment. I don’t teach right now. But recently I have considered developing a workshop. Perhaps online. Possibly in person in the Rogue Valley area. In-person would not happen until after the pandemic calms down significantly. Be sure to subscribe to my newsletter to get announcements of demos and workshops. Happy Painting!!!!