Painting How To
Step-by-Step oil painting of White Rose
This painting how-to begins by strolling through our garden after a light morning rain, we found roses lush and gorgeous. Their rich beauty and sparkling with water drops made recording them irresistible. So, I took several photographs to capture the fleeting moment.
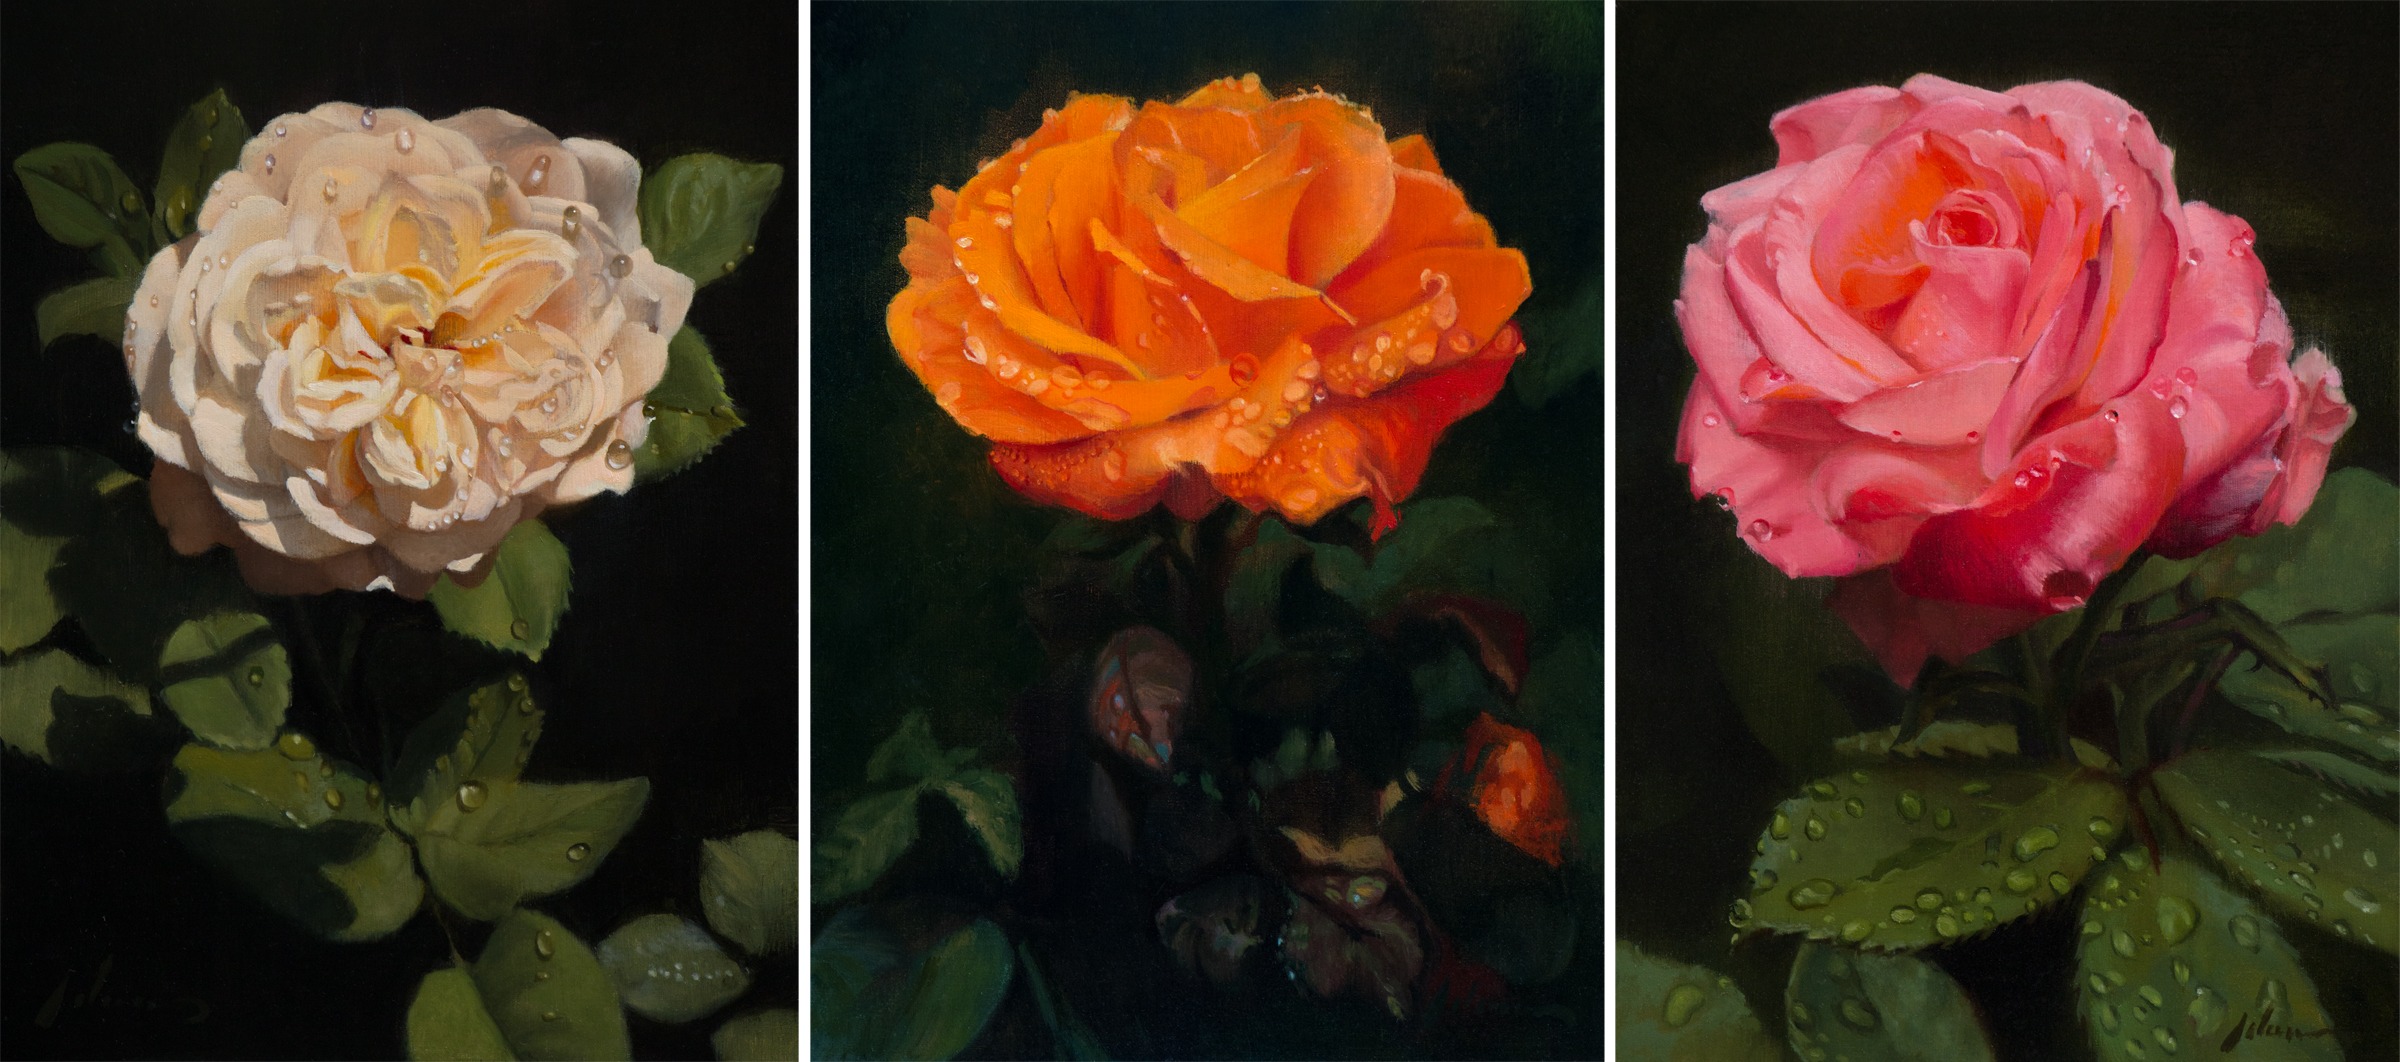
I decided to paint three roses as individual paintings to be viewed together as a triptych. Although this painting tutorial focuses on the White Rose, the thinking and process are the same for the others.
STEP 1: Primary Idea: Light and Raindrops
Every decision made as I paint is led by a the primary idea. What exactly do I want to say about these roses? Beauty fills my heart with joy when I see the wet petal’s rich colors and raindrops sparkling on the deep green leaves. So the primary idea was to celebrate the form, subtle color, and textures of this gorgeous white rose.
STEP 2: Drawing Freehand
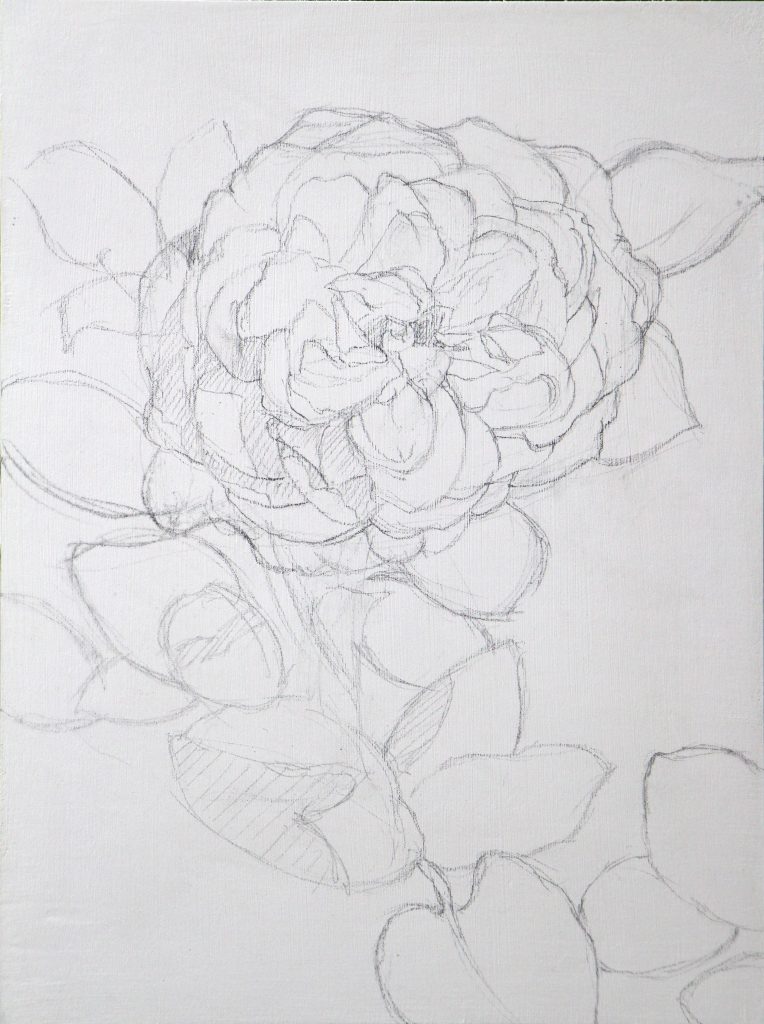
Freehand Drawing
Freehand drawing, rather than tracing a photograph, is super important to my process. Tracing makes it too easy to draw lines and shapes without understanding what they are and how those elements interact to create a composition. Shadows and object edges are easily confused.
I draw directly on a gessoed panel with a 3B pencil exploring the composition to become better acquainted with all the elements in the painting and their relationship to each other. Close attention is paid to the placement of the rose blossom, and the angles and sweep of the leaves.
Workable Spray Fixative is applied to hold the drawing in place.
STEP 3: Block-In
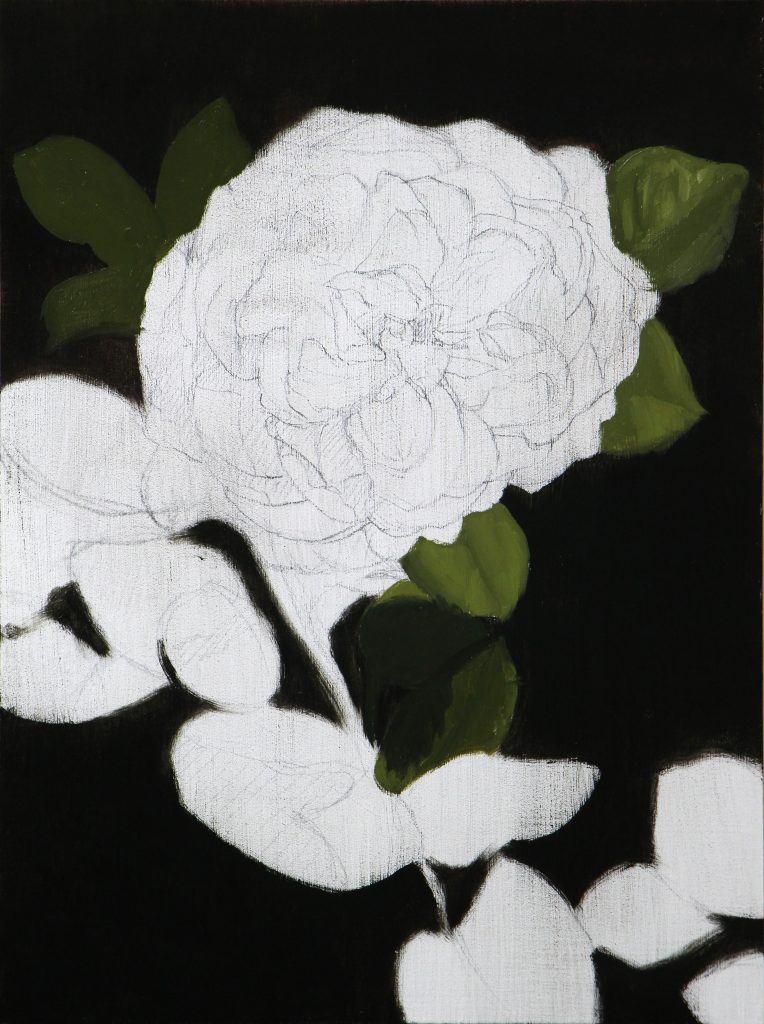
Focus on the large dark shapes
Blocking-In is the time to create a solid structure of form, shape, value, and color. I start by establishing the darkest values first. Working from the background to the foreground, I use a mixture of alizarin crimson and ultramarine blue. Their transparency creates a cool, lush, dark color that sets the stage richer, saturated colors that come later.
I make the green for the leaves with a mixture of ivory black and Indian yellow, and modulate the temperature and value of that mix using titanium white and cadmium yellow deep.
The blossom shape is left untouched until I am satisfied with the dark background. There needs to be enough contrast in the dark areas to separate the leaves from the dark background while allowing the natural-looking edges used to help anchor the leaves to the rest of the scene.
STEP 4: Block-In continued
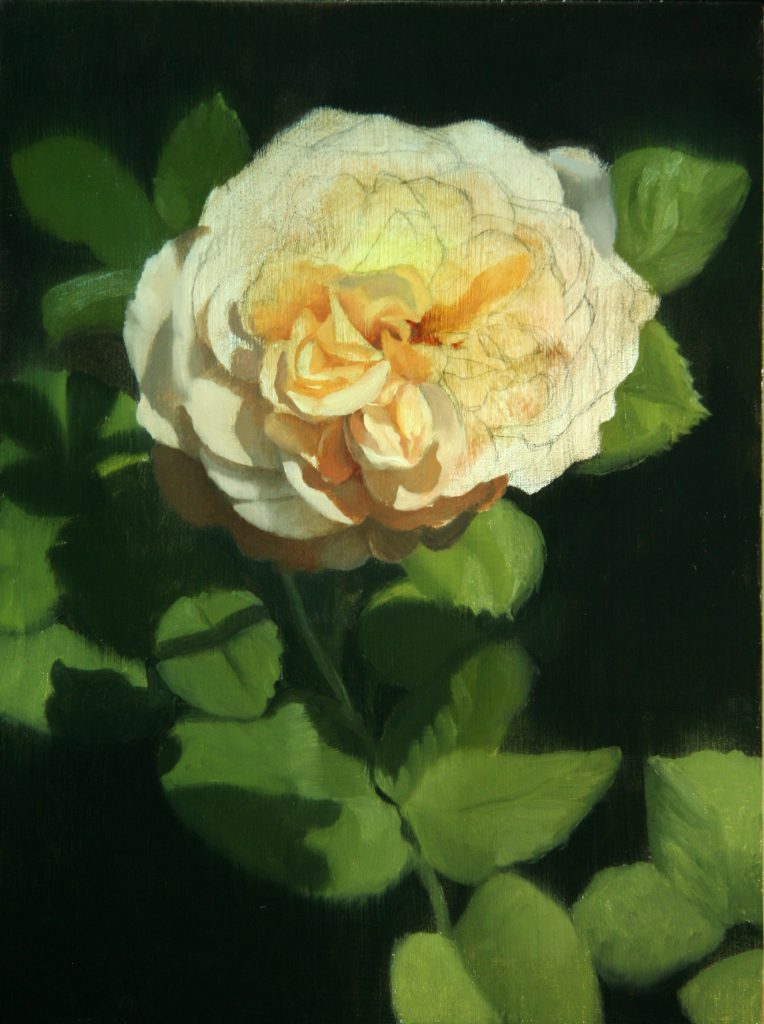
The blossom takes shape
I paint the rose petal’s cool shadows and warm yellow undertone with thin layers of color. The pearly gray colors of cast shadows are created with titanium white, a touch of ivory black, Indian yellow, and a trace of alizarin crimson. The blossom’s base color is a stain made from Indian yellow, and transparent red iron oxide scrubbed on the panel with a bristle brush. Transparent layers keep colors saturated and purer than opaque colors do. I take advantage of those colors in the final stage of painting when I let them shine through subsequent layers of paint.
STEP 5: Refining
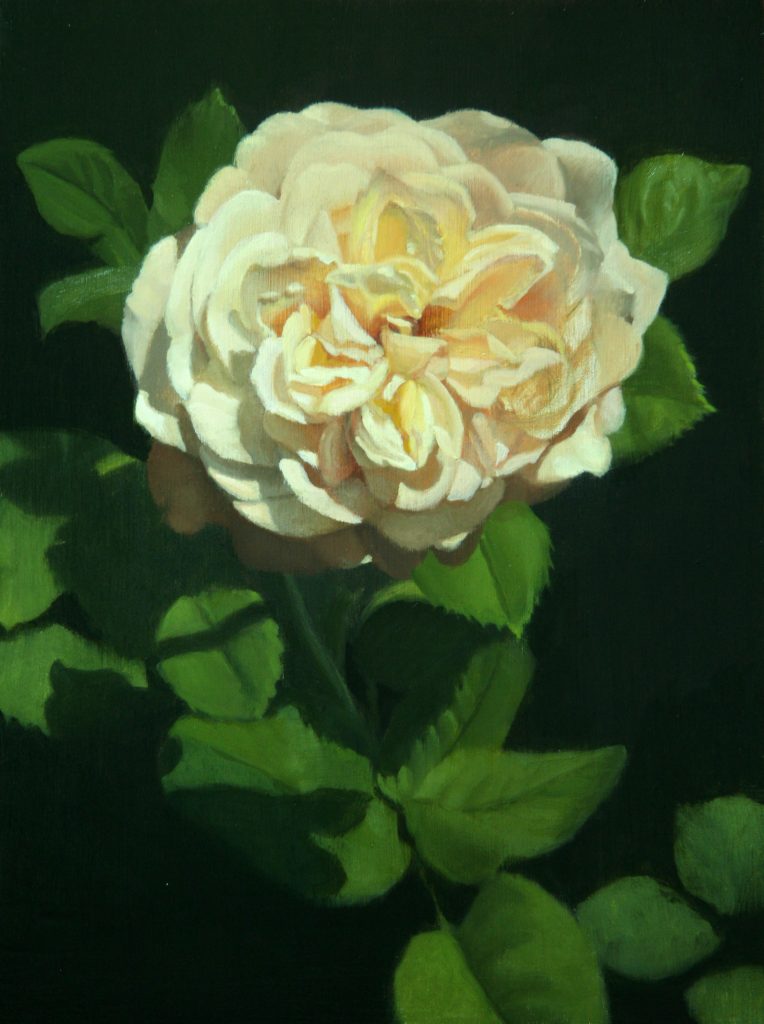
With the main shapes, colors, and values in place, I refine them by blending middle tones, deepening the shadows, adding details, and laying in highlights. The blossoms are built with off-white, nearly ivory-toned, colors, careful to keep them just dark enough to allow contrast with the pure white that will be adding in the final stage.
Time for the raindrops.
STEP 6: Finishing Details
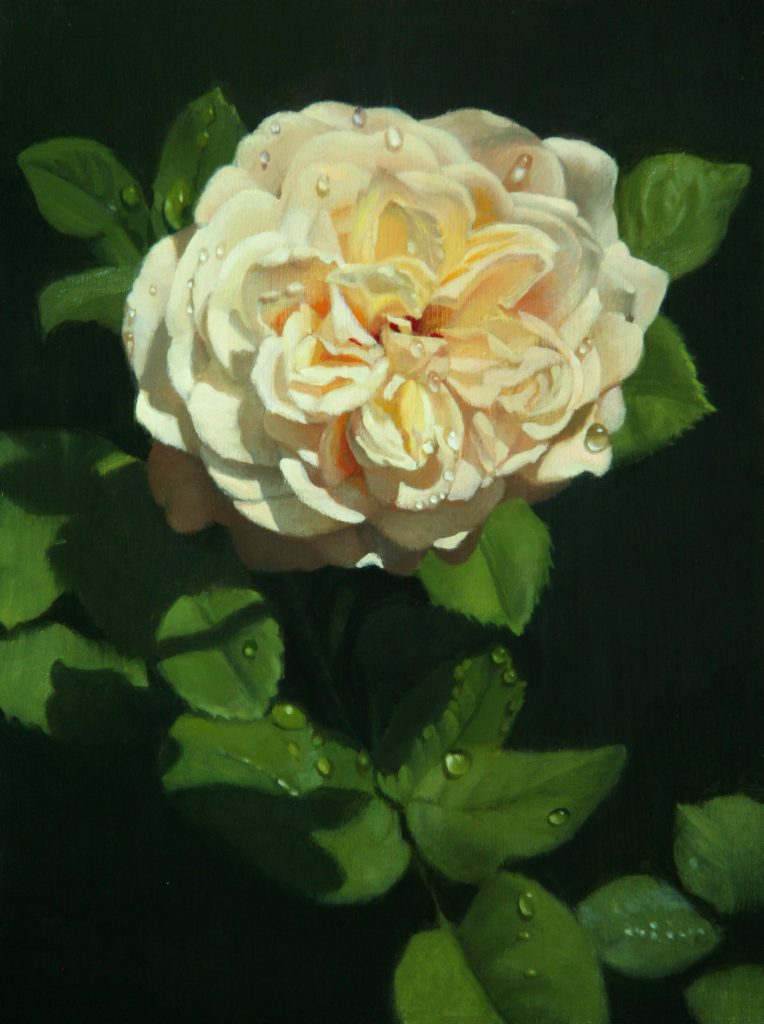
The painting is nearly done. But to bring it to life, raindrops are added to give it sparks of light.
Water drops are fascinating light blending objects. Although perfectly clear, they bend the light in a way that causes them to cast shadows, magnify the objects they sit on and broadcast intense concentrations of light beams into their own shadow. Add a spot of highlight to their surface, and the dance of light is complete. Mixing the greens and whites for the leaf raindrop effect is challenging. It is also very satisfying when I get it right.
GREAT RESOURCES
These books have a treasured place in my studio.
 Alla Prima II Everything I Know about Painting and More
 by Richard Schmid
Alla Prima, this book offers to the artist and art lover alike the wisdom and technical savvy which comes from a classical education and a lifetime of painting and teaching. Writing as an acknowledged master, Richard gracefully leads his reader through the subtleties of painting theory and technique with refreshing directness and unmatched technical authority. With an emphasis on painting from life, he writes with warm humor about the joys and trials of being an artist. He brings to life the romance of Bravura painting and examines the mysteries of color in fascinating detail.

by Juliette Aristides
Lessons in Classical Painting presents aspiring artists with the fundamental skills and tools needed to master painting in the atelier style. With more than 25 years of experience in ateliers and as an art instructor, Aristides pairs personal examples and insights with theory, assignments and demonstrations for readers, discussions of technical issues, and inspirational quotes.
![]() The Art of Still Life
The Art of Still Life by Todd M. Casey
The Art of Still Life offers a comprehensive, contemporary approach to the subject that instructs artists on the foundation basics and advanced techniques they need for successful drawing and painting. In addition to Casey’s stunning paintings, the work of over fifty past and present masters is included, so that the book is both a hardworking how-to manual and a visual treasure trove of some of the finest still life art throughout history and today.
Materials
Birch panel – double primed with acrylic gesso
Paints (M Graham)
In the order arranged on my palette
M Graham Walnut Oil Paints
Alizarin Crimson
Cadmium Red
Cadmium Yellow Deep
Cadmium Orange
Cadmium Yellow Light
Titanium White (quick drying)
Indian Yellow
Ultramarine Blue
Transparent Red Iron Oxide
Ivory Black
Varnish (for restoring color brilliance)
Blair Retouch Varnish
Medium
M Graham Walnut Alkyd Medium
Gamlin Aylkyd Gel Medium
Brushes
Rosemary and Co. Brushes
Evergreen Synthetic
Hogs hair bristle
Other Tools
3B Graphite Pencil
Kneaded Eraser
Palette Knife (only for mixing)
Other Materials
Paper Towels
Turpenoid Natural
Master’s Brush Cleaner


Fabulous and generous tutorial. thank you! The drops are amazing. Seing exactly where is what..
I was curious about the fixative on the3B pencil. I didn’t know you can paint oil over it. ? That the paint will hold on that surface. And assumed that the graphite would fly all over with the spray.. gratefully, Isabelle
Thank you, Isabelle, for your nice comment. I have used spray fix for years to hold the graphite drawing in place, and had no trouble with it as far as painting over it is concerned. An alternative to spray fix is spray retouch varnish. I use Blairs brand. It is designed to allow for additional layers of paint over it. In either case, a very light spray is all that’s needed to hold soft graphite or charcoal drawing in place. Happy painting!
Thank you for the insight into your work. It is amazing, I love it. To know the colours that you use will help me immensely, So interesting to see how you build the painting.
I am very happy that you found this tutorial was helpful. Happy painting! ~ Michael
Looking at your work I realize you are a master. I really liked the tutorial and learned something about new about painting. Thank you, be well.
Wow. This is an absolutely delightful peek into your process. Stunning.
Thank you!